1. Go to the Apple menu and select “System Preferences”.
2. Choose the “Network” control panel
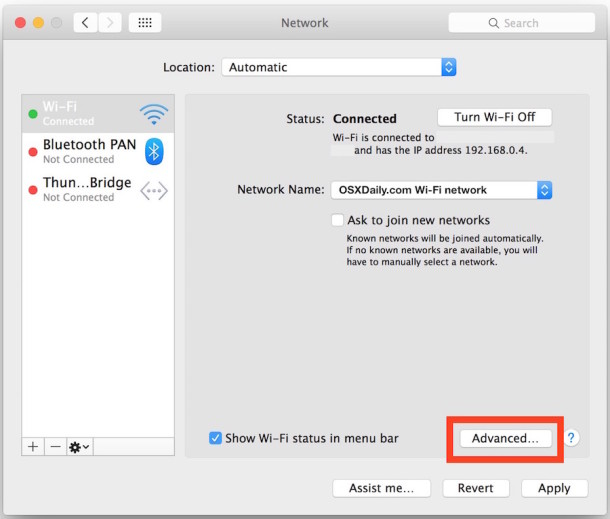
3. Select your network interface from the left side (“Wi-Fi” or “Ethernet” for example),
4. Click the “Advanced” button in the lower right corner of the Network window.
5. Choose the “DNS” tab at the top of the screen to edit, add, or remove DNS
- Add a new DNS server: click on the [+] plus button.
- Edit an existing DNS server: click twice on the DNS IP address you wish to change.
- Remove a DNS server: select a DNS server IP address and then click either the [-] minus button or hit the delete key.

6. When finished making changes to the DNS settings, click on the “OK” button.
7. Now click on “Apply” for the DNS changes to take effect, close out of System Preferences as usual.
The topmost DNS servers will be accessed first, so you’ll want to put the best performing servers near the top of the list for the best results.
In the screenshot examples above, Google DNS servers (8.8.8.8 and 8.8.4.4) are placed above the OpenDNS servers, both of which are faster than ISP provided DNS servers. These servers can be used if you are having issues (not able to access certain websites, getting errors from Google when accessing YouTube, delayed access to certain websites) with your existing DNS servers.